


Jack Skellington nail art tutorial
Make your nails look spooktastic for the spooky season this year with my Jack Skellington nail art tutorial

Halloween is the perfect time of the year to get really creative. Whilst you’ve probably already got your outfit planned, have you given a thought about how you’re going to decorate your nails. Jack Skellington nail art tutorial is a really fun design that only uses three nail products. It’s really simple to recreate and will give you ghoul-tastic nails that will have everyone asking where you got them done. Here’s what you’ll need to recreate it.
- Barry M black nail pen
- OPI white nail lacquer
- Bourjois So Lacque! Noir De Shine nail varnish

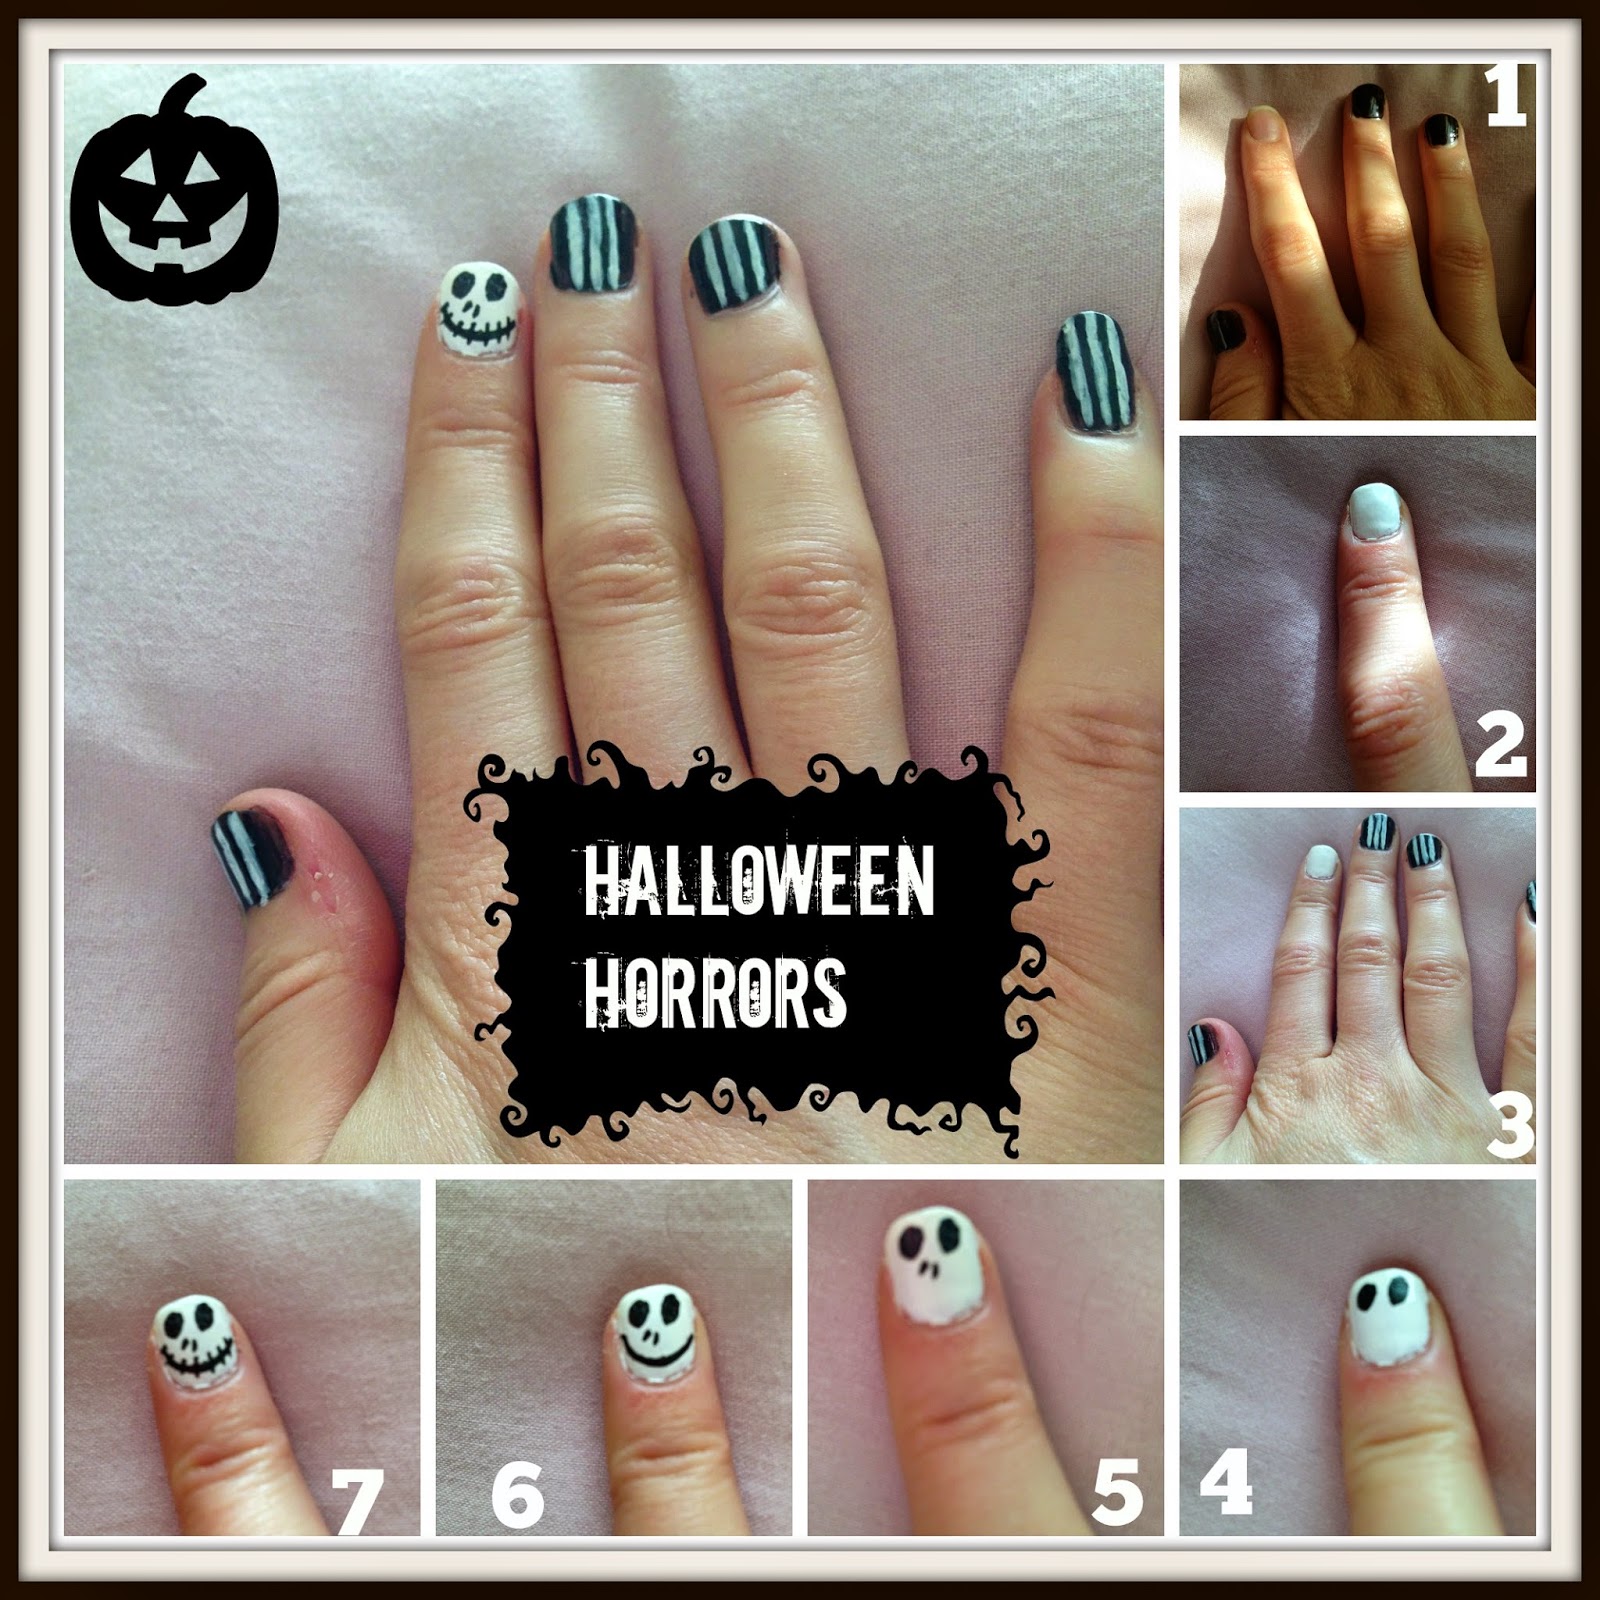
Here’s how to recreate the Jack Skellington nail art tutorial for yourself:
- Paint four of your nails black on each hand but leave one clear for your statement nail
- Paint the one nail you’ve chosen as your statement nail white
- Using a striping brush carefully drag three white lines vertically down your nail
- On your statement nail get a black nail art pen or if you’ve got a steady hand a nail art brush and paint two eyes
- Next mark two small circles for your skulls nose
- Carefully draw a smile from one side of the nail to the other
- Finally add a few spooky teeth
Voila, you have some perfect spooky nails to go with your Halloween outfit.
If you love the post please give it a share on Twitter, Facebook and Pinterest – the design will make the perfect pin!
Want some more Halloween inspiration? Check out these posts.
Get spooky with Mimic Gifts Halloween collection bath bombs
10 of the best Halloween makeup tutorials
20 fantastic Halloween makeup ideas


