


Frankenhorror Halloween nail art tutorial

Get creative this Halloween with this fun Halloween nail art tutorial. The look is pretty simple and you don’t need too much to create it. You will need:

- A black nail varnish or black nail art pen
- Lime green nail varnish
- Clear nail polish protector to avoid chips
Frankenhorror Halloween Nail Art tutorial how to
1. Firstly paint your nails with the lime green nail varnish.
2. Get your black nail varnish or black nail art pen and draw a small amount of hair on your feature nail. For this look you will only be creating one ‘Frankenstein’ on each hand.
3. Draw two spots for eyes.
4. Draw in two small eyebrows just above the eyes.
5. Draw a slight slanted line for the mouth.
6. Finally draw slight upward lines to look like stitches on Frankenstein’s mouth. 
How to do the cobwebs on the Frankenstein Halloween nail art tutorial
1. On the rest of your nails you are going to be creating cobwebs. My webs went slightly skeewiff which is why the first picture looks a little odd. Firstly draw two wavy lines on your nails with equal space between them.
2. Once you’ve drawn your wavy lines pull two lines upwards so it looks like a wavy noughts and crosses grid.
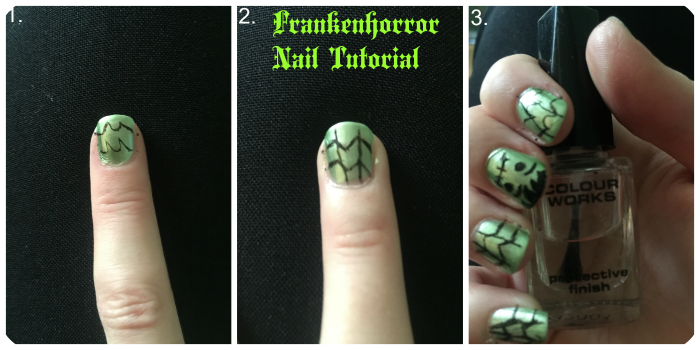
I hope you have fun creating Frankenhorror nails, they’ll look great with your outfit on Halloween. I’d love to see your versions so make sure you tag me on Facebook or Twitter!
Want some more Halloween inspiration?
Check out 10 fun Halloween activities.
Get busy creating unique Halloween chocolates.
Create a unique look with these stunning Halloween makeup tutorials.
Get ready to hide behind the sofa when you watch some of my favourite Halloween movies.


